 |
Guitar Lessons that work!
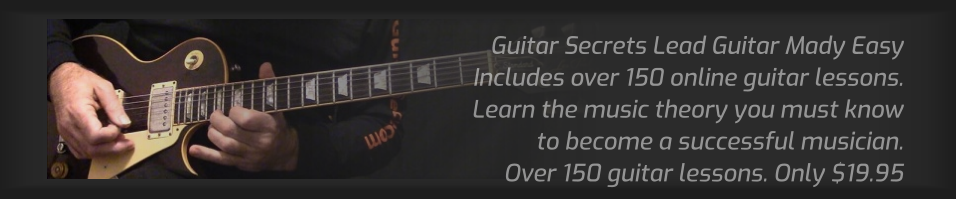
A Visual Learning Experience, Lead Guitar Made Easy
Includes Over 150 online guitar lessons - Become better today!
Welcome to Guitar Secrets
Guitar Lessons that work!

Guitar lesson 1 Guitar Lesson 2 Guitar Lesson 3
Guitar Lesson 4 Guitar Lesson 5 Guitar Lesson 6 Guitar Lesson 7
[ Sharps and flats ] [ Guitar Exercises ] [ Picking Exercise ] [ Guitar Tablature ] [ Guitar Tuning ]
Guitar lesson 2 - Guitar fret-board notes
Our lessons will use colors to represent notes and scales on the guitar fret-board. Look below and notice the colors we will use to represent each note and particular scale.
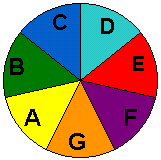
There are 8 notes in the major key. In the key of C major, you have the notes of C D E F G A B and C. There are also notes that are either sharp or flat and that is covered in that particular lesson.
Not only do the colors below represent each note on the the fret-board, but they will also represent a particular scale. For example, the C major scale will be Blue, the B major scale will be Green, the F major scale will be Purple and so on. The colors will also represent the minor scales in the same fashion.
C D E F G A B C In this lesson, we will learn where each note is located on the guitar fret-board.
A musical tone or note can be created in a number of different ways. For example, if you were to push down a single key on the piano, you would be playing a note. To play a note on the guitar, you would fret or push down on a string to create a note.
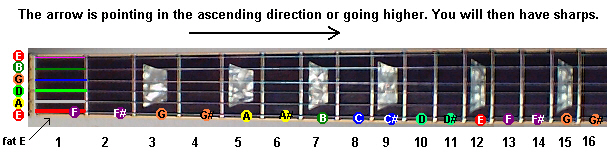
The image below, illustrates a guitar fret-board and shows the notes along the Low E string up to the 16th fret. The low E string is the thickest string on your guitar. The notes illustrated on the guitar fret-board are the E F F# G G# A A# B C C# D D# E F F# G and G#.
Once again, look at the image below and notice the notes along the low E string. The first note is the E note, that is actually the Low E string in the open position. The open position means that you pick or play the string without pushing down or fretting the note. That will give you the low E note or tone.
The 8 notes in the image below, represent all of the notes in the key of C major. The key of C major is unique, because it does not contain any sharps or flats, which are called accidentals. If you were to play the piano, you could play the key of C major by using just the white keys.
The sharp notes are represented by the (#) symbol. The flat notes are represented by the (b) symbol.
The black keys on the piano are the (sharp #) and (flat b) notes and are used to construct other scales or keys. For example, if you wanted to play in the key of G major, you would use the notes of G A B C D E F# G. Notice the F#, it would be a black key on the piano. This information will be reinforced as we move through the lessons and more information will be covered in the sharps and flats lesson.
C D E F G A B C We are going to move along the low E string and lay out each note on the fret-board. The Low E string is the thickest string on the guitar and creates the lowest note The high E string is the thinnest string and creates higher notes then the Low E string.
There will be twelve different notes that we need to learn on the guitar fret-board.
The 12 notes along the Low E string are: E F F# G G# A A# B C C# D D#
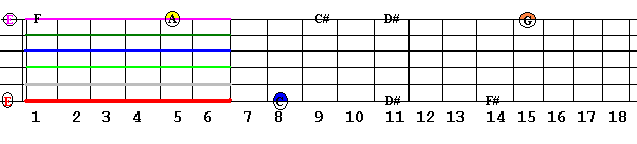
We will illustrate these notes and their placement on the Low E string. Look at the fret-board below and notice the 6 notes to the left of the guitar fret-board. These 6 notes, represent the 6 strings used on the guitar. These 6 strings, when in tune, will be the Low E string, A string, D string, G string, B string and the high E string.
Look at the image of the guitar fret-board above and find the E note or Fat E. This E note, will represent the Low E string when played open. If you pick the Low E string, without fretting any note, you would be playing the E note. Of course, to create this E note, your guitar would need to be properly tuned. I recommend that you should have some type of guitar tuner.
If you were to fret, or push down on the Low E string at the first fret, you would be playing the F note, look above and find that F note on the first fret. The next note, on the Low E string, 2nd fret is the F# note. This is the (sharp symbol #). To get a sharp note, we would move 1/2 step above the previous note, 1/2 step on the guitar, would be 1 fret. The E note will never be sharp. Look below and notice there is no E# note.
As we move along the Low E string, we reach the G note. Look above and find the G note at the 3rd fret. As we move up 1/2 step, or 1 fret on the low E string, we will reach the G# note, 4th fret. Find that G# note.
Moving along the Low E string, we reach the A note, at the 5th fret. Moving to the next fret, we have the A# note.
At the 7th fret, we run into the B note. Find that B note and notice there is no B# note. You will never have a B# note. We will learn more about this when we construct the major scales in that chapter.
The next note, at the 8th fret, will be the C note. Then we would have the C#, D, D# and finally to the E note again. I say again, because on the guitar, every note repeats after 12 frets. To prove this, look at the G note on the 3rd fret, you will find the G note repeated at the 15th fret, 12 frets away from the 1st G note. Compare that to the remaining notes.
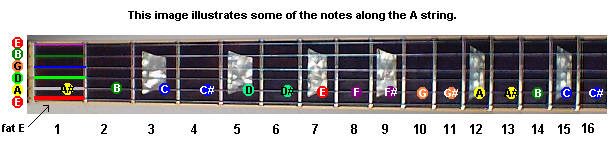
You can figure out each note, on each of the six strings, using the same process as we did above. The image below, will now show you how to find the notes along the A string. Look at the image below. The first note starts with the open A string, find that note. The next note, on the A string, 1st fret, will be the A# note; find that note. The next note is the B note. You can see that it continues as the Low E string did.
Each note is figured out the same way as we did on the Low E string. Notice there is no B# or E#. There never will be a sharp for these two notes. Notice again, the A note is repeated after 12 frets. All the notes would repeat after 12 frets, this goes for every note, scale and chord.
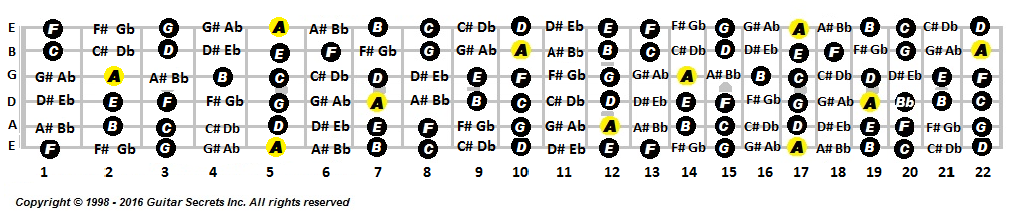
The image below, shows all of the notes of the fret-board ascending and descending. Ascending on the guitar fret-board, means going up the fret-board or going to higher notes. Higher would be moving from left to right. For example, the F is higher than the E note. E to F, F to G, A to B is ascending. B to A, A to G..... is descending or going lower.
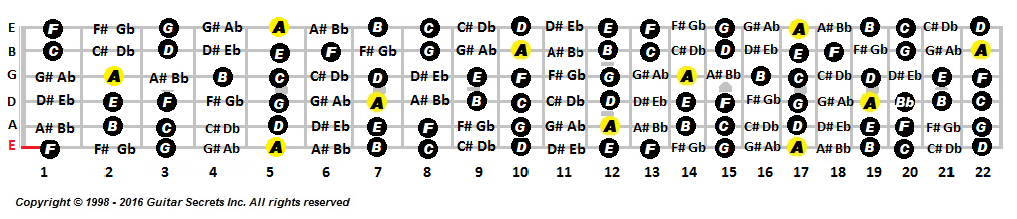
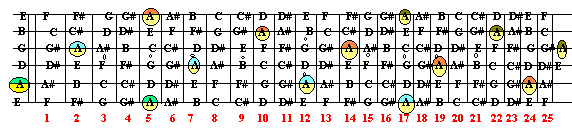
It's very important to learn all the notes of the guitar fret-board and their placement. Use these blank illustrations to fill in all the notes of the fret-board. You can use the illustration below, that has all the notes of the fret-board as a guide to help out.
Look at the image below. This image has all the notes of the guitar, but the A notes are circled. Notice that some A notes have different colors. Playing each A note and its particular color, will sound the same tone. The yellow and green colored A notes are at a lower octave than the yellow and blue A's.
The yellow and blue A's are at a lower octave than the yellow and orange A's. Play each A note on the fret-board and compare to each other. This illustration will eventually become second nature.
Guitar lesson assignment:
- Use the illustrations you've printed out, to fill in all the notes of the fret-board, ascending. Use the image above to help out.
- Once all the notes are filled in, circle all the A, C, D, E and G notes. These are the notes of Am pentatonic scale, we will be learning this scale later down the road.
- Try to fill in all the notes on the fret-board from memory. Do this until you can do it without messing up.
- Then, use a blank illustration and fill in all the notes along both E strings. Try to fill these notes in from memory. Make a few copies of the blank fret-board illustrations. This is a great brain exercise and will help you visualize note placement.
- Begin to memorize the A and C note positions on the guitar fret-board.
- For your next lesson, study the Sharps and Flats lesson.
- Have any questions, drop us a line.
Always use these blank guitar fretboard illustrations to fill in the notes of each scale you are working on.
If this lesson helped you in any way, you should become a guitar secret's member and have access to A Visual Learning Experience, Lead Guitar Made Easy. You will find audio and video examples to help you become a well rounded guitar player. You owe it to yourself, become better today!
Good Luck
Guitar Secrets
Copyright 1998 - 2018 Guitar Secrets Inc. All rights reserved |